Showing posts with label How To. Show all posts

How a differential gear system works

Posted by Fzkl | 6:49 PM | Monday, August 10 | , , , | 0 comments »

A differential gear system is used in cars and other four-wheelers to enable wheels on different sides of the vehicle can rotate at different speeds. This is essential because when making a turn, the outer wheel has to go faster than the inner wheel to make the turn without sliding. This video from the 1930s explains the concept beautifully.


-CLICK HERE TO READ THE REST OF THE ARTICLE-


Money Manager Ex - The Money Managing software

Posted by Unknown | 3:19 PM | Friday, November 7 | , , , , , | 2 comments »

I have always been an impulsive buyer. I buy stuff I want and it does not matter if I am actually going to use it or not. If I like it, consider it bought. Uh Oh! There goes another swipe from my credit card. I buy books which I usually read within a month of purchasing them. I also buy Movie DVD's, Comics (my favourite currently is the Commando Series) and most importantly Computer Games. I love gaming. Well, the point here is I end up spending money here and there and I haven't any clue at the end of a month where all the money went. Yeah, I can track some of it if I look at all the bills collected. That's very time consuming and there are really high chances that some of the bills are misplaced or lost or you just couldn't care enough. But I do care. I want to know where my money is going. I was back on the internet, hunting for an excellent software that could give me the details of knowing where my money is going. How much is spent on books, travel, loans, bills etc. What is my total earning every year? I wanted charts/reports of everything that I could think of.

Fortunately, I didn't have to search for long. I visit this website regularly and came to know that there is a new addition called Money Manager Ex and I just read the few lines of description about this software and downloaded the portable version. After downloading & extracting the files from the zip archive, I launched it. I was amazed at the simple interface. I took my own sweet time to set up the details like accounts, assets, stocks, billing categories etc. and started putting in some data. It should take you anywhere between thirty minutes to one hour to just setup the software to your satisfaction. Now, you will need to start doing some data entry and then once in a month you could generate charts or graphs and see where your money is going.

Here is the overview of the software from the author's website:


Money Manager Ex© is a free, open-source, cross-platform, easy-to-use personal finance software. It primarily helps organize one's finances and keeps track of where, when and how the money goes. It is also a great tool to get a bird's eye view of your financial worth. Money Manager includes all the basic features that 90% of users would want to see in a personal finance application. The design goals are to concentrate on simplicity and user-friendliness - something one can use everyday. Money Manager Ex is a complete rewrite of the original Money Manager .NET. It runs on Windows and Linux and an experimental build is now available for Mac OS X.

Main Features
* Intuitive. Simple, Fast, Clean
* AES Encryption Support
* Maintain checking, credit card, savings, stock investment accounts
* Budgeting
* Maintain and Track Fixed Assets with depreciation
* Reminders for recurring Bills and Deposits
* Simple one click reporting
* Cash Flow Forecasting
* Graphs, Piecharts
* Does not require an install. Can run from a USB key.
* International language support (Available in 24 languages)
* Import data from any CSV format, QIF [ Microsoft Money]
* Printing, Exporting to HTML, CSV
* Non-Proprietary SQLite Database
* Read more in the Features Page.
System Requirements
* Installer and zip for Windows 95/98/ME/2000/XP/2003/Vista
* Binaries available for Ubuntu/Kubuntu/Xubuntu Linux(.deb), SuSE Linux (.rpm)
* Experimental Support for Mac OS X 10.5
* Can be compiled from source for any other Linux Distro

Please visit the author's website for more information and downloads.

-CLICK HERE TO READ THE REST OF THE ARTICLE-


5 minutes Life Videopedia is a website where you can find short video solutions for practical questions and a place for people to share their knowledge. Categorized into Arts, Business, Extreme, Fashion, Fitness, Food, Games, Health, Home, Music, Parenting, People, Pets, Spiritual, Sports, Tech, Travel, Wheels, Life, Tips and Knowledge, 5 minutes is the perfect website to gain knowledge on a specific subject in less than 5 minutes without having to read through a lot of content that you would otherwise do to get your information. 

This video from 5 mins explains itself:


Here are a few interesting 5 mins videos worth checking out:

Guitar Lesson: Introduction to Bar Chords


How to Do the 90 Degree Turn with a Car


How Can I Get Over My Shyness And Ask A Girl Out?


-CLICK HERE TO READ THE REST OF THE ARTICLE-


I have so many e-mail accounts that I find it cumbersome to go to each service providers website. Each time I have to login, check mail, reply or forward e-mail, do some maintenance & logout. Wouldn't it be nice if I could check all my e-mail accounts in one place? I was constantly searching around for this kind of service when I stumbled upon the settings page of Gmail and I could do exactly what I was wishing for. Before I get into more detail, I would like to inform you that this feature does not work with Hotmail :(. This feature will work with any POP3 enabled e-mail accounts. I am happy with getting my Rediff & Yahoo! e-mails to Gmail. OK, what are you waiting for? Go ahead and follow the steps below to get your Rediff & Yahoo mails to Gmail.


1) Rediffmail has POP3 enabled by default. We need to enable POP3 in Yahoo mail before we can proceed.
2) To enable POP3 for Yahoo: Login to your Yahoo account, click on Options & then select Mail Options. Now click POP & Forwarding & then click Setup or edit POP & Forwarding.
3) A new window should open. Make sure "Web & POP Access" is selected. Then click on Save and logout of Yahoo mail.
4) Now, login to your Gmail account and click on Settings (near the top right corner). You should now be able to see a lot of options. Now follow the steps given below to get your Rediffmail and Yahoo mail to Gmail.

Rediffmail
a) Click on Accounts and you should see Get mail from other accounts: (Download mail using POP3). Click on Add another mail account.
b) Enter your full e-mail address. Ex: xabcd@rediffmail.com & hit the Next button.
c) Enter the Username. From the above example, it is xabcd.
d) Enter your Rediffmail password.
e) Leave the POP Server settings as they are.
f) Put a check on Label incoming messages.
g) If for some reason you want to keep a backup of the e-mails on your Rediff servers, put a check on Leave a copy of retrieved message on the server.
h) Once you are satisfied that everything is to your liking, click Add Account. Gmail will instantly verify if your details are entered correctly and you should start getting your Rediffmail to Gmail.

Yahoo mail
a) You will need to go back to step (4) mentioned above and carry out the instructions mentioned there before proceeding to step (b).
b) Click on Accounts and you should see Get mail from other accounts: (Download mail using POP3). Click on Add another mail account.
c) Enter your full e-mail address. Ex: xabcd@yahoo.com & hit the Next button.
d) Enter the Username. From the above example, it is xabcd.
e) Enter your Yahoo mail password.
f) Leave the POP Server settings as they are.
g) Put a check on Always use a secure connection (SSL) when retrieving mail.
h) Put a check on Label incoming messages.
i) If you want to keep a backup of the e-mails on your Yahoo servers, select the first option Leave a copy of retrieved message on the server.
j) Once you are satisfied that everything is to your liking, click Add Account. Gmail will instantly verify if your details are entered correctly and you should start getting your Yahoo e-mails here.

That's it. My advise is to check you Rediff or Yahoo mail accounts once in a week to see if any of your important e-mail is being marked as SPAM. If you think it's all right not to check these accounts anymore, it's up to you. Also remember that these are not the only accounts you can setup in Gmail. You can add as many accounts as you want as long as they are all POP enabled.
Cheers!

-CLICK HERE TO READ THE REST OF THE ARTICLE-


All right, now you have a bootable USB pendrive as well as some of the best data recovery & drive partitioning utilities on your pendrive. How about adding some of the best applications for your day-to-day usage, like browsers, office apps, e-mail, etc. Let's get on with it then.

Just launch your favorite browser and go to PortableApps.com which provides a truly open platform that works with any hardware you like (USB flash drive, iPod, portable hard drive, etc). It's open source built around an open format that any hardware vendor or software developer can use. It's convenient. Now you can carry your favorite computer programs along with all of your bookmarks, settings, email and more with you. Use them on any Windows computer. All without leaving any personal data behind. The PortableApps.com Suite and Platform is free. It contains no spyware. There are no advertisements. It isn't a limited or trial version. There is no additional hardware or software to buy. You don't even have to give out your email address. It's 100% free to use, free to copy and free to share. Hey! it's also available in lots of languages.

What is a Portable app? Here are some answers to your questions directly from their website. There are a lot of applications for you on PortableApps.com. In fact, they have divided the download into 3 types. You can download the package of your choice depending on the amount of space you want to allocate on your pen drive or you can just download the "Main Platform" for portable applications and then customise to your whims and fancies. Given below are the options from their website:
Platform Only: which is basically the "Launcher" for Portable applications. It looks and works like the the Windows Start Menu.
Light Suite: This one is a 35MB download and takes up approx. 100MB of space after installation. This, according to them, is meant for pendrives with 256MB+ free space.
Standard Suite: This is a 113MB download and will eat up around 350MB. If you have a pen drive with 512MB+ capacity, this is a must have. It contains OpenOffice.org suite of office applications which are compatible with Microsoft Office and have almost all the features of Microsoft Office.

Hmmm, I have a feeling you want to customise this. oh! well. Let's start. If you want to, you can also download and install the Light Suite or the Standard Suite and then customise it according to your liking.

1) Download the Portable Apps "Platform". Click on the Download link under Platform Only. Please do not Right Click and try to download. It does not work.
2) Once the download is complete, I recommend that you install this directly to your pendrive. Insert the pendrive into a free USB port, launch the installer & follow the instructions. You will be asked to select the destination. Just hit Browse and select your pendrive from the list the pops up.
3) After the install completes, you will have an option to Launch the PortableApps Menu. Click Finish to see the Menu. You can also access this Menu by clicking on the Taskbar Icon which just got added to your taskbar. You should also know that this Menu will be launched automatically when you insert this pendrive into any USB Port. Absolutely brilliant.
4) I'll give you an example of adding one of the applications. Then you can add how many ever you want using the same steps that we follow here. Please note that there may be some changes depending on the application. Just read the notes section for that application for instructions.
5) Click on this Applications Link and under the Internet section, click on Mozilla Firefox, Portable Edition. Please read the entire page regarding features and other important notes and then click on the download link to download the file.
6) Please close the PortableApps Menu now. When the download is done, double-click the file and follow the instructions to install it. Please install it to the same pendrive where you installed the Menu earlier. These files are known as "Portable Application Format" files or PAF, in short. After the installation is over, launch the PortableApps Menu by browsing to your pendrive and double-clicking on StartPortableApps. You should now see Mozilla Firefox, Portable Edition listed in the menu.
7) Phew! That's it for now. You can go ahead, download and install the applications of your choice.

-CLICK HERE TO READ THE REST OF THE ARTICLE-


Maintain your Windows PC; Part 2: Adding Utilities

Posted by Unknown | 12:48 PM | Thursday, October 30 | , , , , | 1 comments »

Have you been showing off your new bootable pen drive to your friends? You must be having a halo behind your head right now. Wanna make that halo stay there for a longer time? Ok, here are a few utilities and links to their official pages.


I will say this again and again, please back up all your important data on your PC or anybody else's PC before doing anything that involves Disk partitioning, formatting, recovery etc. You get the idea.

Before you proceed, please download & install the following software to extract files from a compressed archive. We are assuming that you know about compressed files and folders and how to work with them - 7zip and/or Universal Extractor.

Utilities to be copied to your Pen Drive:

1) TestDisk
TestDisk is a powerful free data recovery software! It was primarily designed to help recover lost partitions and/or make non-booting disks bootable again when these symptoms are caused by faulty software, certain types of viruses or human error (such as accidentally deleting a Partition Table). Partition table recovery using TestDisk is really easy. TestDisk has features for both novices and experts. For those who know little or nothing about data recovery techniques, TestDisk can be used to collect detailed information about a non-booting drive which can then be sent to a tech for further analysis. Those more familiar with such procedures should find TestDisk a handy tool in performing onsite recovery. We recommend using the DOS version of this utility if you are not able to boot into Windows. Just download it, extract it and copy it to a folder on your pen drive. Remember to rename the folder to TestDisk as Long File Names are not supported in DOS.

2) Super Fdisk
Super Fdisk is the free DOS Partition Manager. With Super Fdisk you can quickly and easily create, delete, format partitions in DOS. There is a free Windows version also available at the website.
Download, extract and copy to a folder of your choice on the pen drive. If necessary, rename the folder. A detailed FAQ and step-by-step screenshots are available on the author's website.

3) Undelete Plus
Undelete Plus is a quick and effective way to restore accidentally deleted files. It can also recover files that have been emptied from the Recycle Bin, permanently deleted files within Windows using the Shift + Delete, and files that have been deleted from within a Command Prompt. Undelete Plus works under Win 95/98/Me/NT/2000/XP/2003/Vista operating systems. The program supports all Windows file systems for hard and floppy drives including FAT12/16/32,NTFS/NTFS5 and image recovery from CompactFlash, SmartMedia, MultiMedia and Secure Digital cards. This utility does not have a DOS version. Download the version without the installer. Just one single file. Copy it to your pen drive and you are ready to go. To launch this utility, just double-click on the file.

4) Recuva
Recuva (pronounced "recover") is a freeware Windows utility to restore files that have been accidentally deleted from your computer. This includes files emptied from the Recycle bin as well as images and other files that have been deleted by user error from digital camera memory cards or MP3 players. It will even bring back files that have been deleted by bugs, crashes and viruses! Runs on Microsoft Windows Vista, XP, 2003, 2000 and 98.

These are some of the best free recovery/disk utilities I have come across. Please use these with care. In our next part, we will come up with some Windows based applications & utilities which will make you a "Portable" guru.

-CLICK HERE TO READ THE REST OF THE ARTICLE-


How to download using torrents?

Posted by Fzkl | 1:06 PM | Tuesday, October 21 | , , | 0 comments »


1) What are Torrents?
BitTorrent (torrents in short) is a method of downloading files on the internet. Instead of downloading a file from one single location (a specific server), BitTorrent helps download files from multiple sources while at the same time sharing the downloaded portion with other people who are downloading the same file. It is a mutual system where you share what you are downloading.

2) Why use Torrents?
Dowloading with torrents doesn't require the file we are downloading to be at a single location. If the server having the file has issues we wouldn't be able to download the file. But distributing it across many people gives multiple sources to download from.  Different parts of the files you are downloading are taken from different sources. Also, transferring from multiple sources is generally much faster than otherwise. Popularly shared files download much faster using torrents as there are multiple sources to download them from. Downloading using torrents can be conveniently paused to be resumed later. This is helpful if you are downloading a large file and would like to shut your system down over night.

3) What do I need to download using torrents?
a) You will need a BitTorrent client to download files using torrents. Some of the popular ones are: uTorrent, BitTorrent, Azureus and Bittornado.
b) A .torrent file:  Files ending in .torrent have information regarding the files you are trying to download. 

4) Is downloading torrents illegal?
Downloading copyrighted content like movies and music is illegal unless the producer wishes to distribute the content in BitTorrent format. Using BitTorrent as a method to share information you have created is not illegal.

5) Where can I find .torrent files?
.torrent files are normally provided by the creator of the information you want to download. For instance, if you want to download the latest version of Fedora Linux from RedHat, you will find the .torrent file for it in their download page. Popular sources for illegal file distribution are Pirate bay, BtJunkie are Mininova.

6) How do I start downloading?
Just open the .torrent file with the BitTorrent client and the download should begin.

7) There are many torrent files for the content I want to download. How do I choose the right one?
Choose the torrent file which has the highest number of seeds are peers. Seeds are the number of systems having a complete copy of the files you are trying to download and presently sharing. Peers are the number of systems having a partial copy of the files you are trying to download.

8) My downloads are slow using torrents. Is there anything I can do to speed it up?
Make sure you are using .torrent files which have many sources and peers. BitTorrent does not work properly if your ISP blocks outbound content on ports that are being used by the Torrent protocol. This is very common if your ISP is providing a static IP address. Torrent download speeds are very bad with ISP like Hathway which blocks outbound on non-http ports. Airtel has open outbound ports.

-CLICK HERE TO READ THE REST OF THE ARTICLE-


Are you the sort who likes building things for a hobby? Want to spend your idle time in the weekend building a bookshelf instead of buying one? As a kid, did you spend your time dismantling your toy car to get to the motor and do cool stuff with it? If so, instructables is the website to help you get back on track to Doing It Yourself (DIY).


Instructables is split into various sections like Art, Craft, Food, Games, Green, Home, Kids, Life, Music, Offbeat, Outdoors, Pets, Ride, Science, Sports and Tech. Instructables features user created DIY content presented as step by step procedures for clear building instructions.

Some interesting instructables I came across:

1) Building a Solar Powered R/C car


2) How I built an electricity producing wind turbine


3) Chess table


-CLICK HERE TO READ THE REST OF THE ARTICLE-


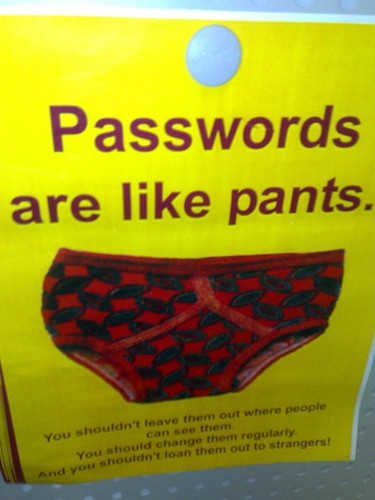
Ask yourself the following:

1) Have you ever been bothered that you have the same (or mostly the same) password for all your login accounts?

2) Have you ever felt insecure about losing that one password and consequently losing your privacy or important information in the login account with no way to recover or undo what has been done?

3) Have you ever feared forgetting your password because you had to add numbers and special characters to make it stronger?

If the answer to any of the above is a "YES", read on.

Nothing creates as many identities as being an active user of the internet. These range from innumerable email accounts to almost every other service on the internet. And remembering passwords for all of these is a tough task. Managing passwords can be quite painful and the fear of losing them is irritating. There are a lot of password management tools out there but somehow I am not very comfortable with the idea of having a software track all my passwords. Besides, since I am not the only user of my computer, I find it safe to remember all my passwords in my mind. But remembering too many isn't easy and I needed an algorithm that I could quickly execute on my brain.

After some thinking I came up with a method to create unique and strong passwords for every account that I hold and a convenient method of changing them. I have used this method for three years now and it works like a charm.

The password is generated using four pieces of information:
1) The name of the website for which's account you are trying to create the password. Eg: Yahoo
2) The username at this website. Eg: phyliadilia
3) Place of birth. Eg. oslo
4) Year of birth. Eg. 1985


Now the above information is manipulated like this:
1) The first character of the website is taken = y
2) The first character of the username is taken = p
3) The characters of the place are right shifted by 1. So "oslo" becomes "ptmp"
4) The date of birth is right shifted = 2096

The password is framed by combining the above = ypptmp2096

Advantages, logic and rules of the strategy:

1) Since the first parameter is website dependent, I already know the first letter of my password whenever I visit the website.

2) I have different login names for different websites (due to unavailability mostly). Most often, many begin with the same alphabet or there are not enough variations. So if I forget the password, I just need to recollect some of my commonly used login names and try it in combination with the rules of the rest of the password.

3) Parameter 3 brings in a non dictionary word into the password and adds character count. With every additional character added to a password the time taken to crack a password using a brute force cracker will increase by powers of 10.

4) Parameter 4 brings in a number into the password thereby introducing non-alphabet character which make the password tougher to crack.

5) The last two parameters remain the same for any website and account and the first 2 characters vary. I have noticed that this strategy over a period of time is very easy to recollect by remembering the base algorithm of password formation.

6) Whenever I want to change the existing password (in case the password expires), I just add a right shifted second character from my name to my password. Eg. if "ypptmp" expires, I change it to "yphptmp", where the h is the 2nd alphabet of the login name. For ease of rememebrance, I do this to all accounts whenever I do it to one.

Enjoy safe, distinct and easy to remember passwords.

-CLICK HERE TO READ THE REST OF THE ARTICLE-